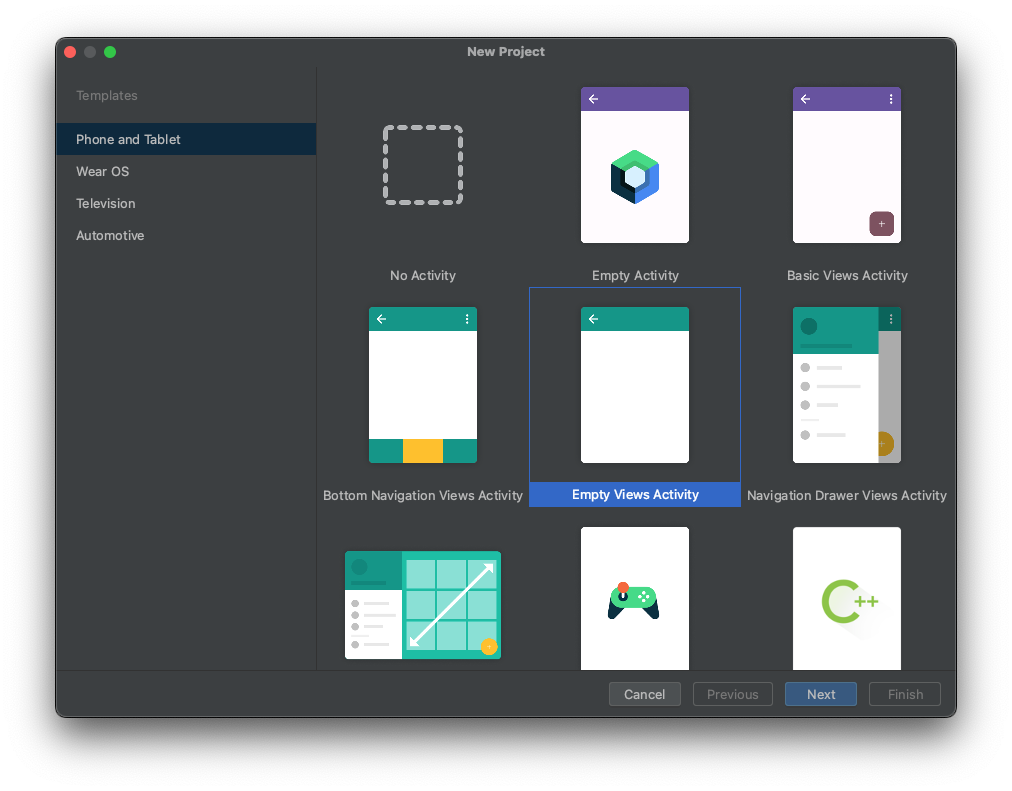
Start Android Studio on MacOS, Linux or Windows and use the wizard to create a new Android project. Follow the wizard instructions and fill in the following information:
For your first app choose the „Empty Activity“, as you do not need the features included with the other activity templates.
Fill out the fields as followed
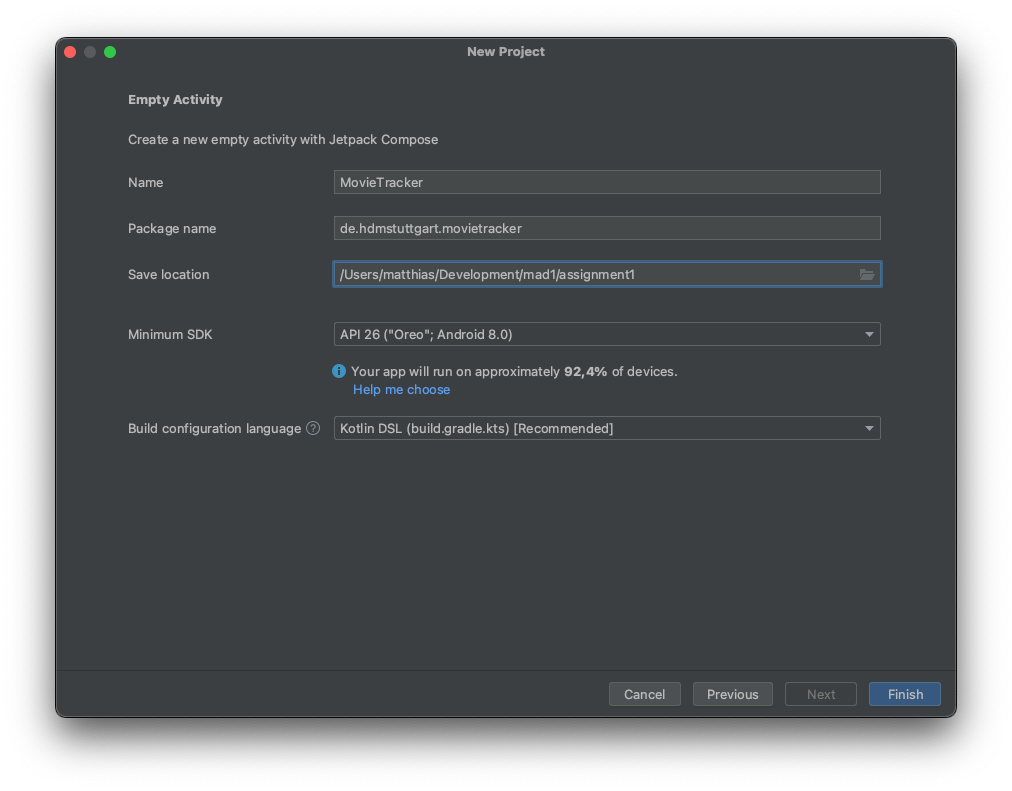
Name: MovieTrackerThis is also the Application Name appearing in the App list on the device later on.
Package name: de.hdmstuttgart.movietrackerThis will be used to generate the package namespace (following the same rules as for packages in the Java programming language) that you want all your source code to reside under. This also sets the package name under which the stub Activity will be generated. Your package name must be unique across all packages installed on the Android system; for this reason, it’s important to use a standard domain-style package for your applications. The example above uses the „de.hdmstuttgart” namespace ― when you develop your own applications, you should use a namespace that’s appropriate to your organization or entity. This is the reason why in the Android Studio Wizard you can only change the company domain and the package name is generated.
Build configuration language: Kotlin DSL [Recommended]This value specifies the minimum API Level required by your application. It is a number referring to a version of the Android firmware the user needs to run your application. If you choose the latest version your app will only run on devices with the latest version which usually are not too many. For this and the following assignments please select „API 26: Android 8.0 (Oreo)“.
After clicking on “Finish” your app project will be generated.
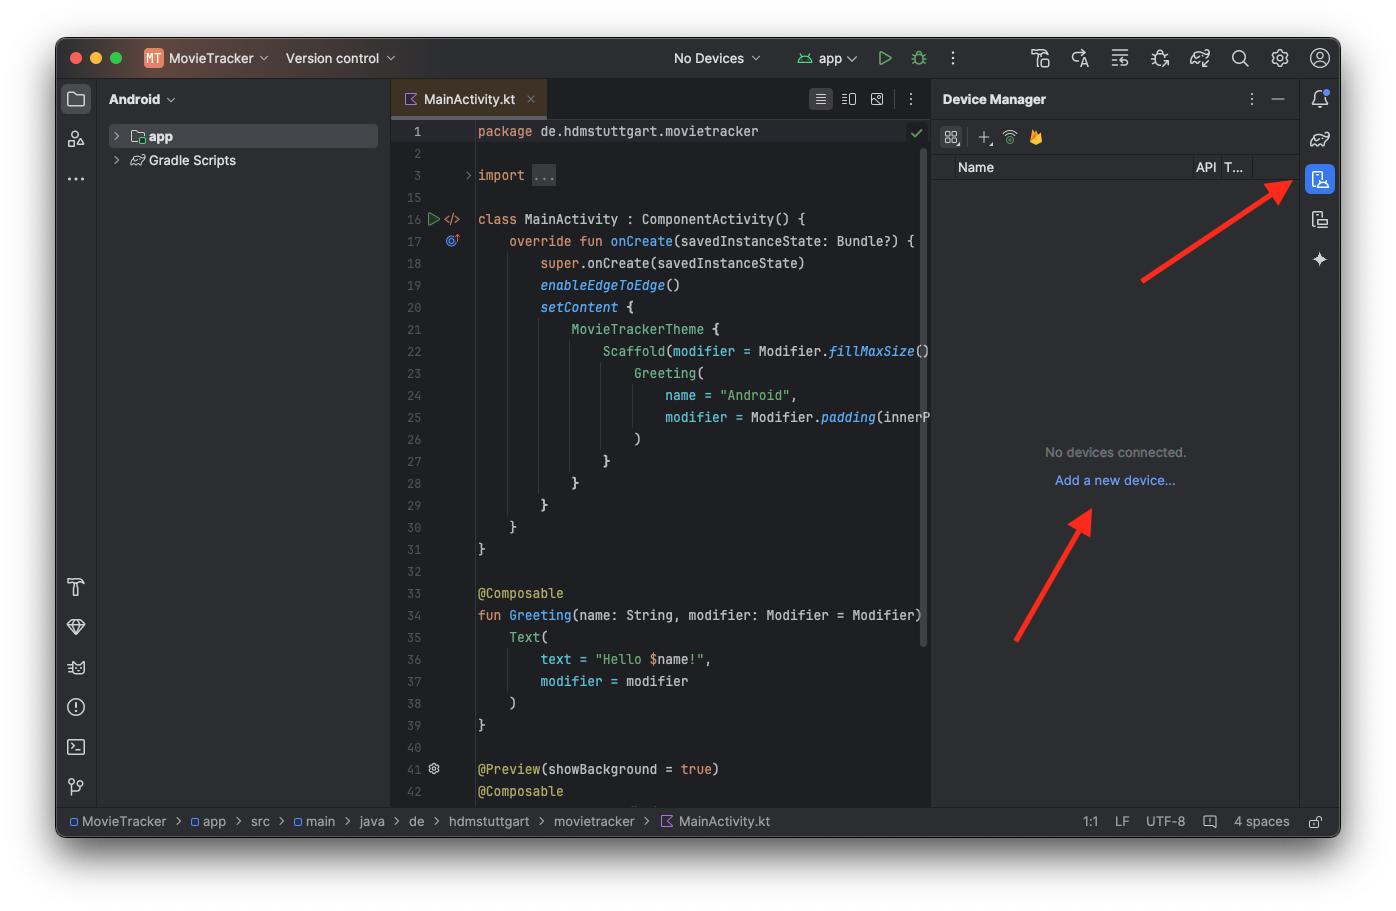
Use the Android Virtual Device (AVD) Manager in Android Studio to create a virtual Device with the latest available Android Version.
You can find the AVD Manager in the right toolbar at the top in Android Studio.
You should see a empty screen with a "Add a new device..." button. Click this button
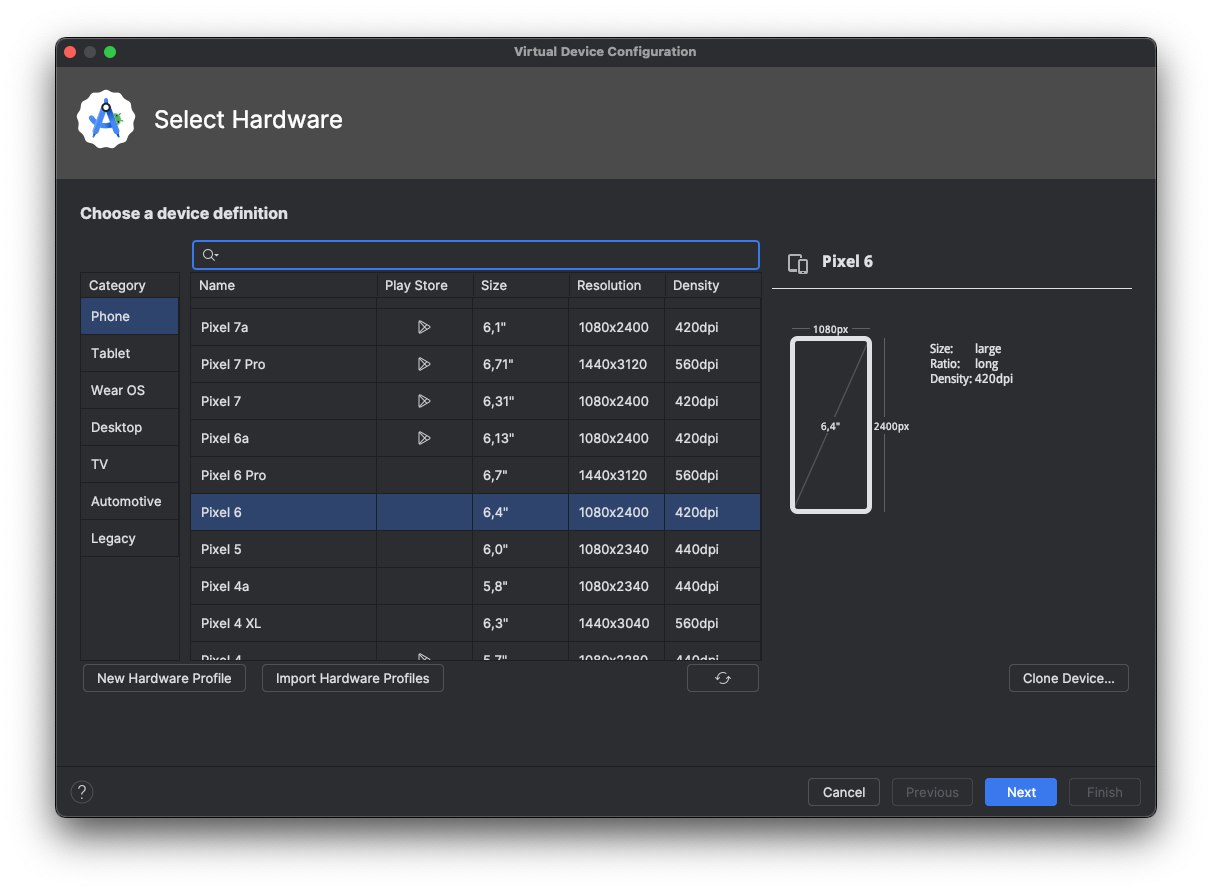
For our assignments, we will use the Pixel 6 template.
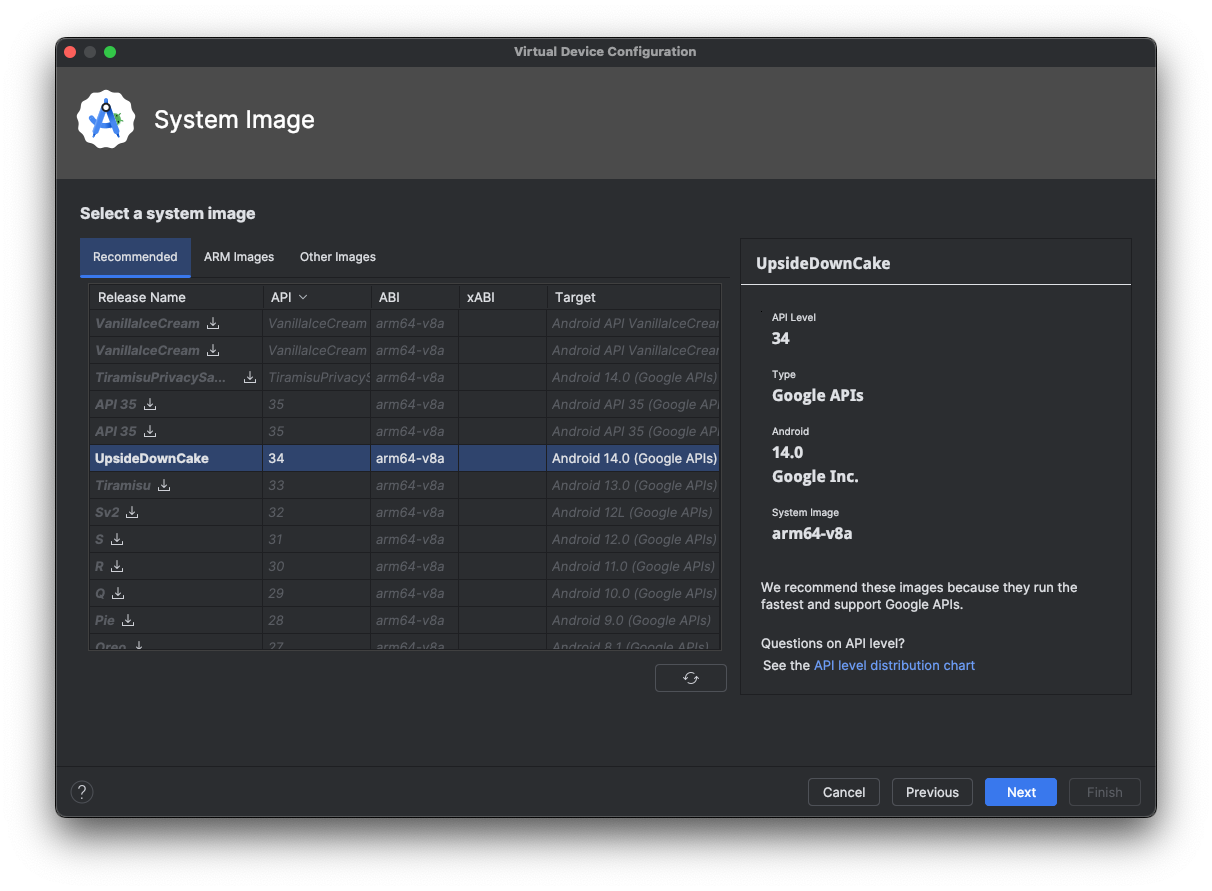
For our assignments, we will use the Android UpsideDownCake / 34 Eventually you have to download Android R and confirm installation before being able to select it. This will take around 1.2 GB of space on your hard drive.
Click the next button
Click the finish button and
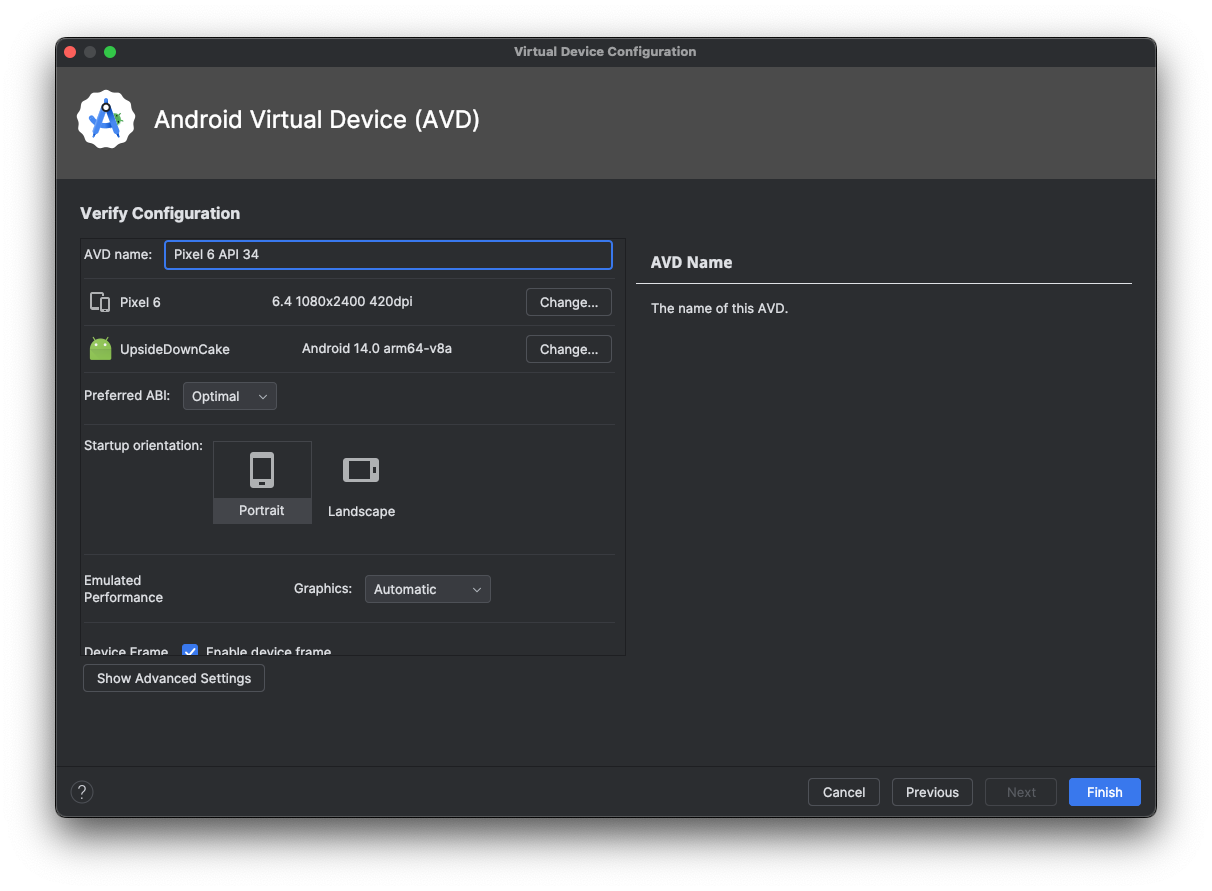
After finish, you should see the setup device in your list. Click the start button to start the emulator.
You can setup multiple devices with different templates run several emulators at the same time. This will take some ressources of your host computer

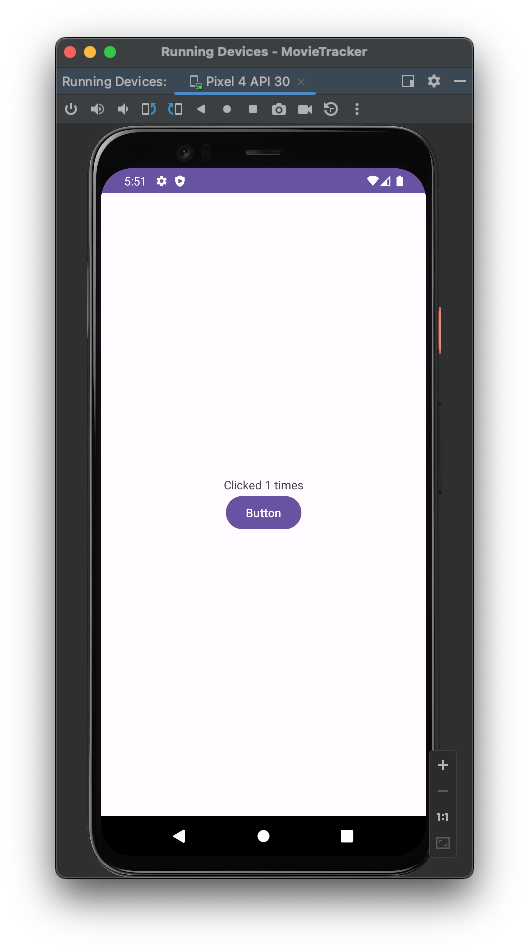
Edit your MainActivity class and add a new @Composable containing a Column which has a Text and a Button. Please mind to add Modifier.testTag("button") to the Button. This is needed for the UI test later.
The UI should then look like in the following screen capture:

Modify the onClick action of the Button.
When the button is clicked the text in the Text should change to „Clicked X times“. Where X is the number of times the Button was touched.
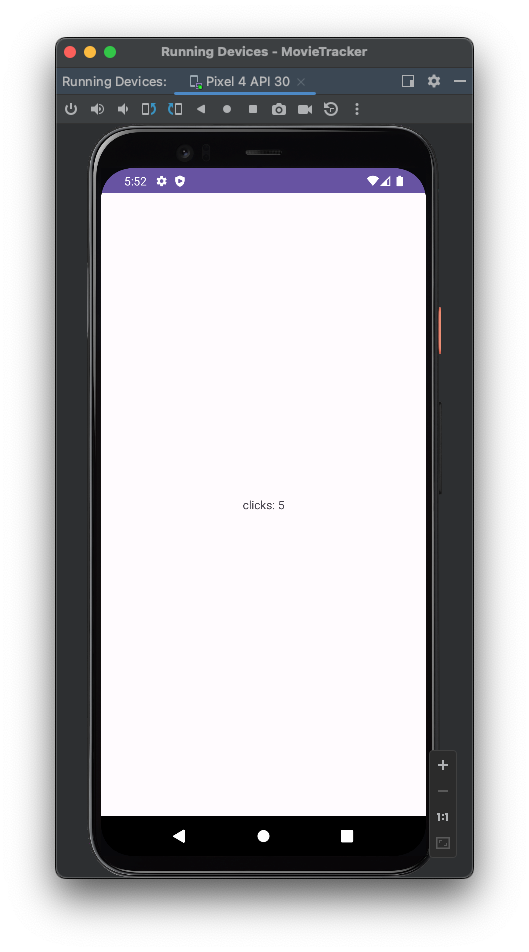
When click counter reaches 5 clicks, a new activity should open. It shows a Text with the count of the clicks "Clicks: 5" from main activity.
In order to ensure you set up all requirements correctly, run this Android Espresso UI test on your project. Therefore, check if the correct Gradle dependencies are set in your app modules build.gradle
Module build.gradle.kts:
androidTestImplementation(libs.androidx.espresso.core)
androidTestImplementation(libs.androidx.junit)
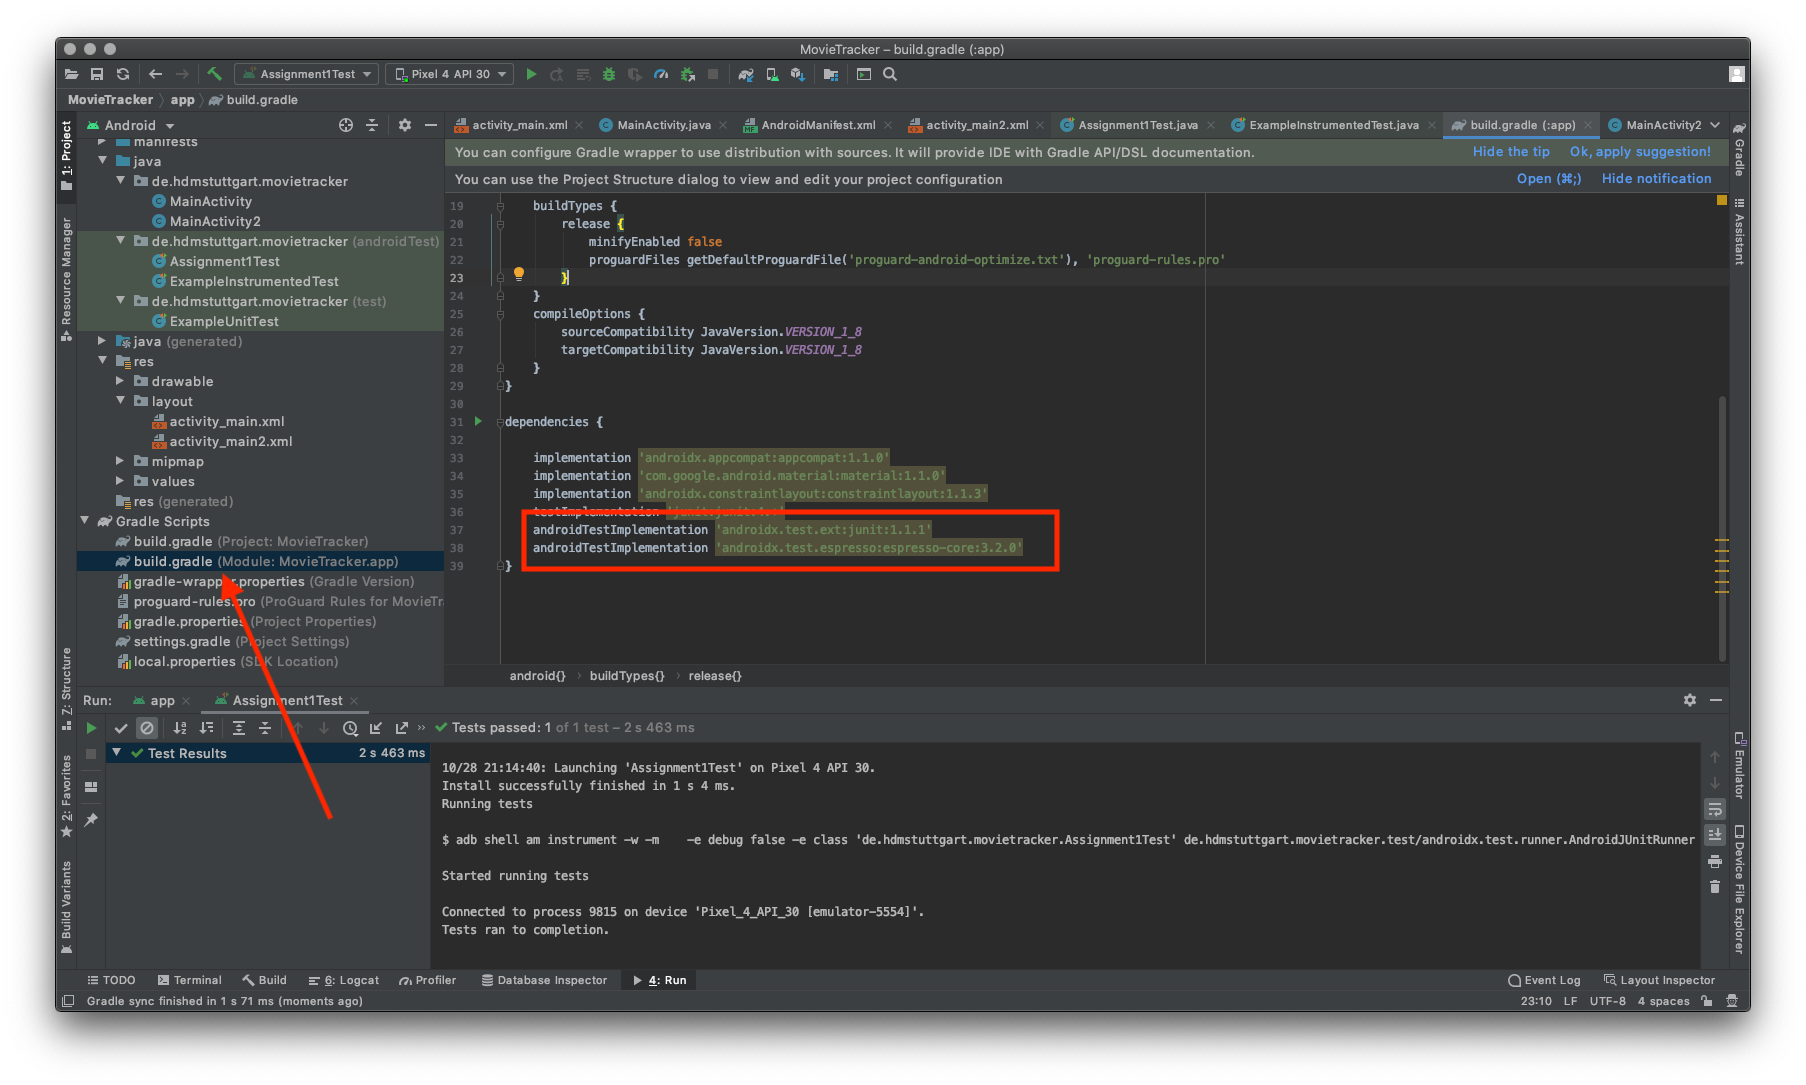
Copy this class to your project folder "app/src/androidTest/java/de/hdmstuttgart/movietracker" And name the class accordingly "Assignment1Test.kt"
Check out the official Android UI testing cheat sheet
package de.hdmstuttgart.movietracker
import androidx.compose.ui.test.assertIsDisplayed
import androidx.compose.ui.test.junit4.createAndroidComposeRule
import androidx.compose.ui.test.onNodeWithTag
import androidx.compose.ui.test.onNodeWithText
import androidx.compose.ui.test.performClick
import org.junit.Rule
import org.junit.Test
class Assignment1Test {
@get:Rule
val composeTestRule = createAndroidComposeRule<MainActivity>()
@Test
fun myTest() {
composeTestRule.onNodeWithTag("button").assertIsDisplayed()
composeTestRule.onNodeWithTag("button").performClick()
composeTestRule.onNodeWithTag("button").performClick()
composeTestRule.onNodeWithTag("button").performClick()
composeTestRule.onNodeWithTag("button").performClick()
composeTestRule.onNodeWithText("Clicked 4 times").assertIsDisplayed()
composeTestRule.onNodeWithTag("button").performClick()
composeTestRule.onNodeWithText("Clicks: 5").assertIsDisplayed()
}
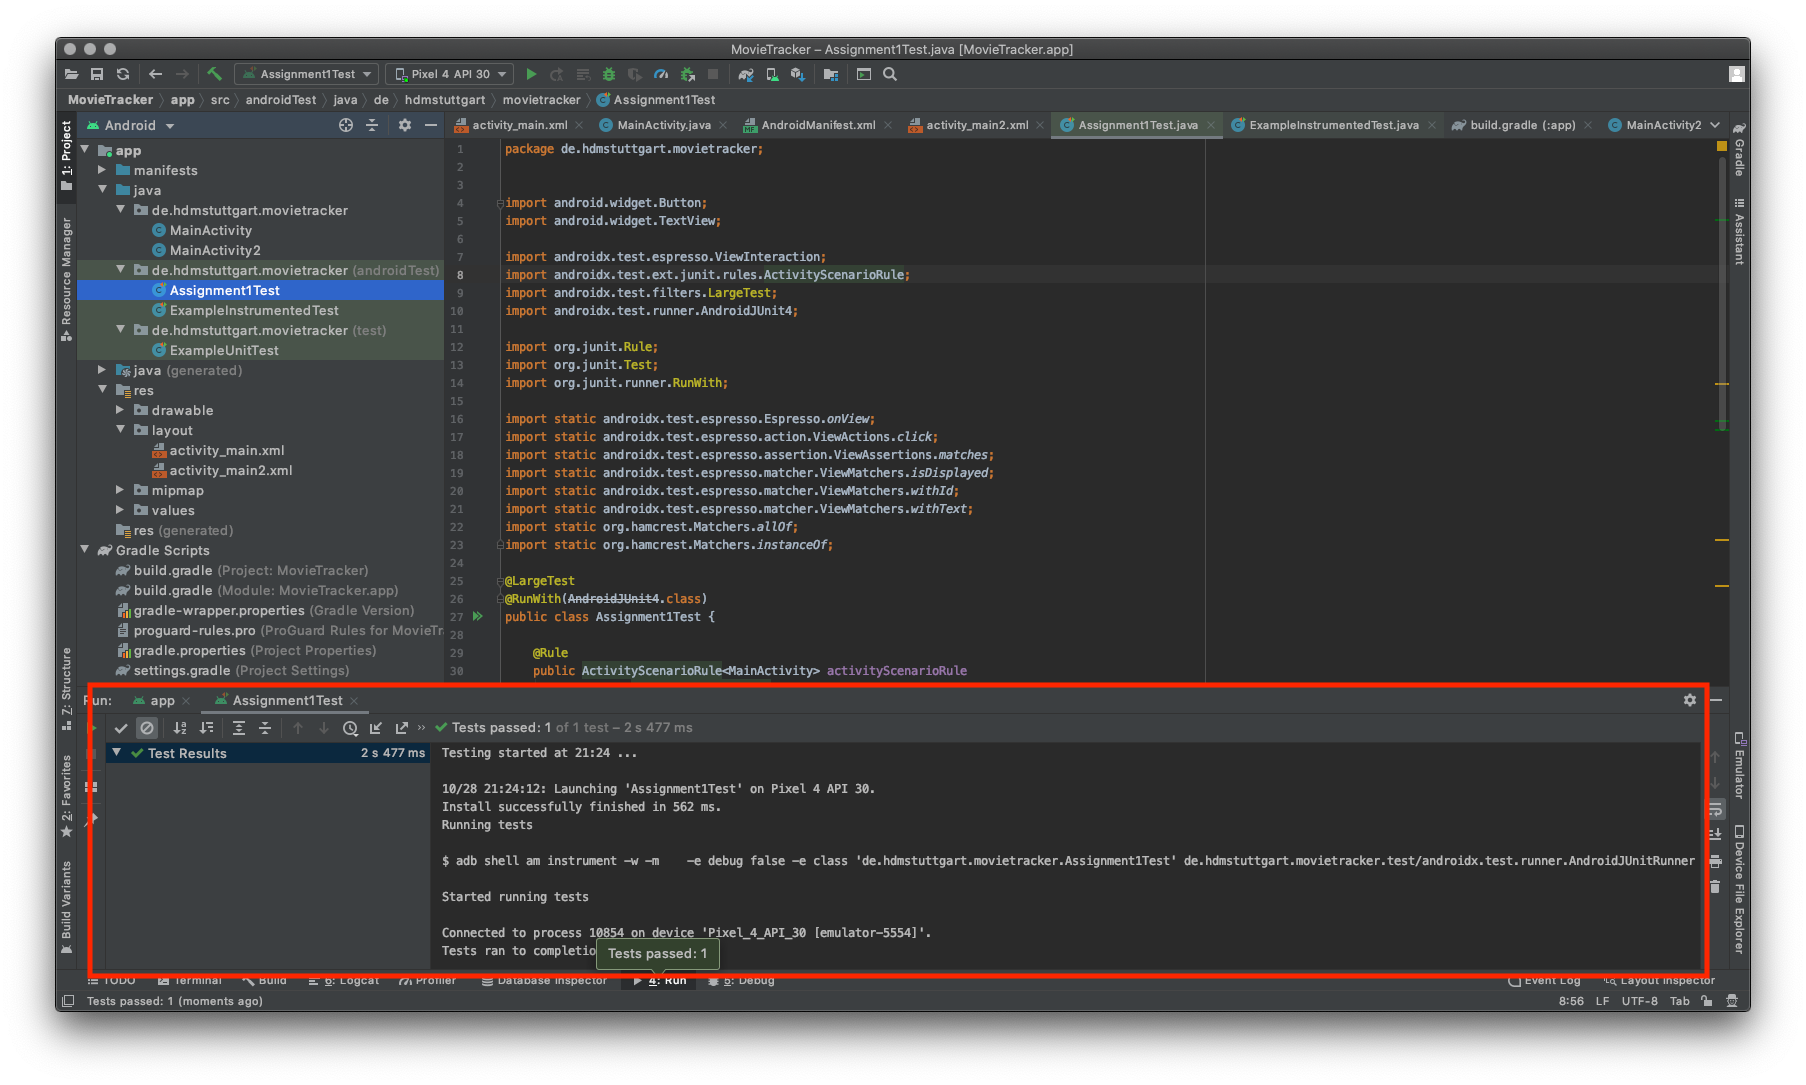
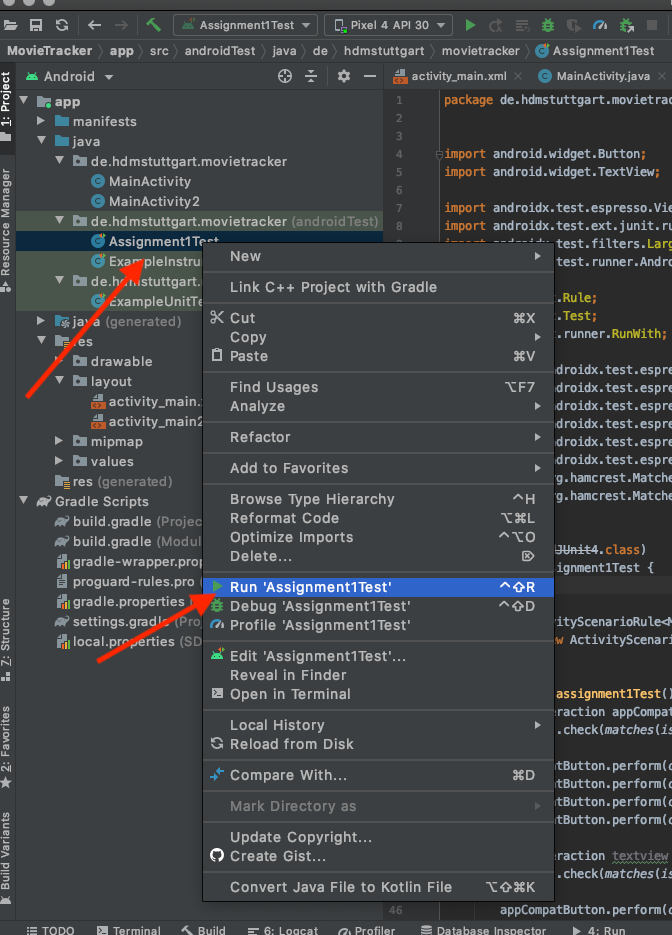
}Click on the green double arrow next to class Assignment1Test in Android Studio and select "Run Assignment1Test"
A test run window at the bottom of Android Studio should appear and show you the test passed.